 I don't even remember where I found this picture, but it has been my screensaver on my phone for a very long time. I like it because it is a reminder not only to see the good in others, but to speak only kind words. I have seen the destruction that gossip has caused in my workplace, and sometimes I even get caught up in it. So I try and remind myself of this quote. No one wants to be talked about behind their back, and I'm sure I've been talked about behind my back, and it's not a pleasant work environment when you are paranoid that people are talking about you. So for "beautiful lips, speak only words of kindness …" -Audrey Hepburn
Sunday, November 4, 2012
Audrey knows best
I don't even remember where I found this picture, but it has been my screensaver on my phone for a very long time. I like it because it is a reminder not only to see the good in others, but to speak only kind words. I have seen the destruction that gossip has caused in my workplace, and sometimes I even get caught up in it. So I try and remind myself of this quote. No one wants to be talked about behind their back, and I'm sure I've been talked about behind my back, and it's not a pleasant work environment when you are paranoid that people are talking about you. So for "beautiful lips, speak only words of kindness …" -Audrey Hepburn
Wednesday, October 17, 2012
The path to using all natural beauty products - on a budget!
Let me give you a little background about what has caused me to try all-natural products. . .
I have been struggling with acne for the past 3 years now and it has affected me so much that I eventually went to the dermatologist. He blamed the progesterone in my IUD, recommended I get it removed, and also put my on doxycycline and spironolactone. I ignored his advice to remove the IUD, because it was the easiest birth control I had ever used, and my face was starting to clear up with the medicine I was prescribed. He also gave me some good advice that the harsh face wash products we use, dry out our skin, so our body produces more oil to moisturize our skin, and it is that oil that clogs our pores and causes acne.
One night I took the doxycycline really late and then went straight to bed, I was up that whole night with heartburn, but I ignored it. The next day whenever I ate food, it kind of stung when it went down my esophagus, but I ignored that feeling and continued eating my BUFFALO chicken wraps and taking my doxycycline before bed,(my face was clearing up I wasn't about to let some minor hiccup, like heartburn stop my treatment). The next few days, the pain increased to the point where EVERYTHING I ate and drank hurt, including water. I eventually went to the doctor, dehydrated and worn out from not being able to eat. The doctor put me on two antibiotics to treat the bacteria that causes stomach ulcers, and prevacid - an antacid. She also reinforced the fact to STOP the doxycycline. After a week of sleeping in a chair, eating only bread and butter (once I could get anything down) and this horrible metal taste in my mouth the antibiotics caused, I finally started to feel better. But of course the antibiotics caused other infections, but a simple treatment with diflucan cleared that up.
After that experience, I called my gyn up and got the IUD out as soon as possible. I could be reading too much into this, but I had and IUD placed, the progesterone in the IUD caused acne. I used harsh chemicals to try and treat the acne, which only dried up my face and caused more acne. I took medicine for acne, which I didn't follow the directions for and caused other health issues. It all seemed to spiral out of control for me until the point where I was done. Done with medicine, done with chemicals, and done with artificial hormones. Now don't get me wrong, sometimes medication is unavoidable and beneficial - when prescribed by a doctor and the doctors instructions are followed.
While I was struggling with all of this, my mom had been telling her hairstylist about me and her hairstylist recommended all natural products. I have always been sensitive to some things IE cheap metal and harsh shampoo, causing dry itchy skin and occasional eczema of the scalp. When your body is reacting to these sensitivities, it is unable to put 100% effort on fighting other things - like acne. So my mom gave me some of her all-natural shampoo and conditioner (I am still searching for a cheap version) and Neutrogena body-oil (that stuff is awesome!).
And then I stumbled on this blog, http://healthydiaries.com/2012/07/17/how-i-improved-my-skin-acne-scaring-overall-complexion/ all about cleansing your face with oil. The whole idea is that oil dissolves oil, and it doesn't dry out your face so your skin isn't working overtime trying to produce oil, and an overproduction of oil will end up clogging your pores. Its all natural, and insanely cheap! Just extra virgin olive oil and Castor oil!


I have been struggling with acne for the past 3 years now and it has affected me so much that I eventually went to the dermatologist. He blamed the progesterone in my IUD, recommended I get it removed, and also put my on doxycycline and spironolactone. I ignored his advice to remove the IUD, because it was the easiest birth control I had ever used, and my face was starting to clear up with the medicine I was prescribed. He also gave me some good advice that the harsh face wash products we use, dry out our skin, so our body produces more oil to moisturize our skin, and it is that oil that clogs our pores and causes acne.
One night I took the doxycycline really late and then went straight to bed, I was up that whole night with heartburn, but I ignored it. The next day whenever I ate food, it kind of stung when it went down my esophagus, but I ignored that feeling and continued eating my BUFFALO chicken wraps and taking my doxycycline before bed,(my face was clearing up I wasn't about to let some minor hiccup, like heartburn stop my treatment). The next few days, the pain increased to the point where EVERYTHING I ate and drank hurt, including water. I eventually went to the doctor, dehydrated and worn out from not being able to eat. The doctor put me on two antibiotics to treat the bacteria that causes stomach ulcers, and prevacid - an antacid. She also reinforced the fact to STOP the doxycycline. After a week of sleeping in a chair, eating only bread and butter (once I could get anything down) and this horrible metal taste in my mouth the antibiotics caused, I finally started to feel better. But of course the antibiotics caused other infections, but a simple treatment with diflucan cleared that up.
After that experience, I called my gyn up and got the IUD out as soon as possible. I could be reading too much into this, but I had and IUD placed, the progesterone in the IUD caused acne. I used harsh chemicals to try and treat the acne, which only dried up my face and caused more acne. I took medicine for acne, which I didn't follow the directions for and caused other health issues. It all seemed to spiral out of control for me until the point where I was done. Done with medicine, done with chemicals, and done with artificial hormones. Now don't get me wrong, sometimes medication is unavoidable and beneficial - when prescribed by a doctor and the doctors instructions are followed.
While I was struggling with all of this, my mom had been telling her hairstylist about me and her hairstylist recommended all natural products. I have always been sensitive to some things IE cheap metal and harsh shampoo, causing dry itchy skin and occasional eczema of the scalp. When your body is reacting to these sensitivities, it is unable to put 100% effort on fighting other things - like acne. So my mom gave me some of her all-natural shampoo and conditioner (I am still searching for a cheap version) and Neutrogena body-oil (that stuff is awesome!).
Face Wash:
And then I stumbled on this blog, http://healthydiaries.com/2012/07/17/how-i-improved-my-skin-acne-scaring-overall-complexion/ all about cleansing your face with oil. The whole idea is that oil dissolves oil, and it doesn't dry out your face so your skin isn't working overtime trying to produce oil, and an overproduction of oil will end up clogging your pores. Its all natural, and insanely cheap! Just extra virgin olive oil and Castor oil!

I use a 3:1 ratio of cold-pressed Castor oil to extra virgin olive oil, but she recommends a 1:1 ratio for people with normal skin and 1:3 ratio of cold-pressed Castor oil to extra-virgin olive oil for those with drier skin.
Step 1: run the hot water on your tap
Step 2: massage the oil mixture into your face (massaging your skin increases circulation which helps your scars heal)
Step 3: place a wash cloth under the hot water and then rest the wash cloth over your face until it cools (this steams your face, which opens up the pores). Repeat this step 1-2 more times.
Step 4: gently wipe your face clean with the wash cloth.
Do this every night, and in the morning just rinse your face with water. It's so easy! I've been doing it for two weeks now, and I don't have any new pimples and I even think my skin tone is more even.
Face scrub:
I had been using this lemon-sugar hand scrub for a while now, and after I read the previous blog, the though occurred to me to use this as a face scrub too.
I didn't exactly follow the directions, she recommends lemon juice or essential oil - I didn't get much scent out of the lemon juice and didn't want to put essential oil on my face so I just mixed extra virgin olive oil with sugar (salt works too) and it worked well.

Just mix extra virgin olive oil and sugar (or salt) in a jar until the desired consistency (moist enough to spread on your face). I keep it in jar in my shower and just scrub my face (and anywhere else that needs exfoliating) once a week. It couldn't be any easier (or cheaper).
Face Mask:
This is a diy mask that I just tried tonight, and my face feels nice and smooth.

This mask is so simple, 2 tablespoons honey, 1 tsp nutmeg, and 1 tsp cinnamon. Apply to your face and leave on for 30 minutes, and then wash it off with warm water, while gently scrubbing to exfoliate. According to the blog above, nutmeg and honey act as anti-inflammatories, which reduce swelling and redness (great for acne scars), and the cinnamon and nutmeg exfoliate your face when you wash the mask off.

I'll keep you posted on my journey, especially as I find more budget-friendly all natural products.
Thursday, October 11, 2012
Autumn Decorations
One of my favorite things about fall, is the decorating. I love the burnt orange colors, mums and pumpkins.
This year, with us re-doing our bathroom, I am not doing much decorating, but I thought I'd share the little decorating I did do. I was at home depot (picking out stuff for our bathroom) and just grabbed one pie pumpkin and a bag of gourds totaling 8-9 dollars.
I have a very large candle vase that I either decorate with a large candle or these little brown pine cone-like balls that I got from Marshall's one year. So for fall this year, I just placed some of the small gourds in the vase with the brown pine cone balls.

I also had a hay bale left over from last year (home depot), so I placed the pie pumpkin on the hay. And I had an old basket that came with mums that I bought last year, so I placed some cardboard in the basket to make it appear more full and filled up the basket with the rest of the gourds.

Not too bad for not going all out this season :). Now all I need is a cup of hot apple cider and to sit by the fire!
Tuesday, September 25, 2012
Hanging Basket Storage

This was a project I saw on pinterest and was so excited to do . . . but I didn't read any directions or take the time to measure anything, so it turned out to be a major pain. But it's done now and really helps with storage in my laundry room.
I found these baskets 50% off at Hobby Lobby, and just bought some twine from Home Depot. The spare twine will come in handy for fall decorating :). I attached the twine to a needle and threaded it through the baskets figuring I would tie knots under the baskets once I hung it and chose there permanent location. That was a big mistake - once you move one basket, the others shift, and there is four corners on each basket that shift! But I eventually got them all straightened out and tied knots in the twine at the right places.
Now that it is done, I have a better organization system for my laundry room!
Sunday, September 16, 2012
Budget Bathroom Remodel Phase 2 - Painting and Staining!
I know we went a little backwards by tiling first and then painting, but my Uncle and Aunt came into town to help us tile, so we tiled first. Then painted the room Burnished Metal by Behr with a crisp white trim.

I have to say the bathroom looks completely different already. The tile floor looks amazing, and then adding a dark grey paint just transformed the room.
We didn't want to spend he money on a new vanity, so we decided to stain it. I tried staining once before this and will never do it again, it was ugly and ended in tears. So Shaun graciously stepped up to the task and stained our vanity a dark walnut color.

I can't wait to put it all together!

I have to say the bathroom looks completely different already. The tile floor looks amazing, and then adding a dark grey paint just transformed the room.
 |
| This is our laundry room, you'll have to ignore the really old washing machine and lack of dryer |

I can't wait to put it all together!
Saturday, August 25, 2012
A money-themed birthday :)
I'd being lying if I didn't say that my husband really likes just getting money for his birthday. I became pretty tired of just giving him a card with money in it every year, so this year I decided to get creative ;)
First I made him a card and taped money to the front with removable double sided tape:


First I made him a card and taped money to the front with removable double sided tape:


Next, the present:
I bought Shaun a box of his favorite chocolates and removed the chocolates. I placed them in a bag for him to eat on his birthday (it took all my will power to not eat one!)


I then placed different sizes of money in the slots and added a quote from Forrest Gump!


Friday, August 24, 2012
easy homemade birthday card
Now I love my cricut for making cards and scrapbooking, but this is a super easy card that you don't need a cricut for. It's really simple, just roll up different colored paper and glue to a blank card. For the wick you can use a small white rope or I just used thin white ribbon because I had some spare from another project. Cut the rope/ribbon into small pieces and glue to the card and the inside of the rolled up paper. Then you can either write or stamp "Happy Birthday" and voila you have a homemade birthday card! This project only took me 15-20 minutes :)


Thursday, August 23, 2012
Budget bathroom remodel- Phase 1: TILE
Well this is my bathroom before . . . I'm ashamed to admit that we had carpet in our bathroom ever since we bought our house TWO years ago. Keeping the carpet clean around the toilet was not easy, so when my awesome Aunt and Uncle volunteered to come visit for the weekend and help us tile our bathroom, we jumped at the opportunity!

Our first step was to remove the carpet and linoleum . . . luckily Shaun did all this while I was a work ;) My Aunt and Uncle arrived friday evening and got straight to work that night laying down the backer board.

All day saturday was spent laying tiles, it already looks 10 times better!

Sunday was grout day, luckily it only took a couple of hours because my Aunt and Uncle had a five hour drive back home that day.

And then, we cleaned the grout and have a tiled floor!!!

Our floor looks so nice, that now we are in the process of replacing the sink and light fixtures and painting to make the rest of the bathroom look as good :) I'll post pictures as we go
Monday, August 13, 2012
Homemade Peach Jam

Its peach season!!!! My awesome aunt brought over some peaches from Palisade, CO
last week and I decided to try to make some homemade peach jam for the first
time. It wasn’t that hard at all and is really delicious!
The first step was preparation, I washed the canning jars, then covered the lids with boiling water from the kettle, and filled the canning pot with water and put on the stove top to boil.


I then washed and peeled the peaches and separated into small pieces (the directions said to cut the peaches, but they were so ripe I didn't even need to cut them). I placed the peaches a pot to heat and soften, occasionally crushing them. Once the peaches were a soft pulp, I removed them and measured them and then placed back in the pot. I added 1 cup of sugar for every 1 cup of peach pulp and heated on the stove until it thickened.


I then poured the jam into my canning jars, cleaned off the rim with a wet rag, placed the lids on and put in the boiling water. I kept the jars boiling according to the canning directions and for my altitude (35 minutes). At less than 1,000 feet ,if you are using pint size jars it takes 20 minutes, and quart size jars takes 25 minutes, but I suggest looking up the canning time table and checking for your altitude as well.


I removed the jars from the water using a jar lifter and placed the jars on a rag so that they were not touching each other. After letting the jars cool for over 3 hours, I checked the seal, if the middle of the lid does not pop up, your good to go!

I couldn't resist and had to open a jar to try the peach jam right away and it was sweet and delicious! Hopefully I will have some left over to give as gifts!


Thursday, July 19, 2012
Homemade Frozen Entrees
Shaun and I both have a tendency to procrastinate and then when we are hungry at 7pm we have nothing to eat so we end up eating out or getting take out or buying microwave meals. Also, I leave for work at 6am and only give myself about 10-15 mins to get ready and leave for work, so I never eat breakfast at home and love to just grab something to eat in the car on the way to work. Because of our procrastination and sleeping in, I spent most of my day off making foods that I could freeze and then microwave and eat later. Some of these ideas I got off pinterest, some I've been making for a while, and some recipes I just kinda threw what I had in my kitchen together and it turned out pretty yummy!
 I'm obsessed with anything buffalo flavored, so I found a recipe for shredded buffalo chicken sandwiches and just converted it to wraps that I could freeze for a later date! Here is the recipe for the pulled buffalo chicken sandwiches: http://mykitchenapron.blogspot.com/2011/07/crock-pot-buffalo-chicken.html I didn't have the ranch dip mix packet, so I made it without the ranch mix and just put ranch dressing on the wrap before I rolled it up.
 Ingredients:
3 lb bag of frozen chicken
1 bottle Frank's Red Hot Sauce
1 package whole wheat tortillas
Ranch dressing
Place all ingredients in the crock pot and cook on low for 6 or 7 hours until the chicken shreds easily. Removed chicken from crock pot, shred and place on a whole wheat tortilla and place ranch on top. Roll into wrap, wrap in saran wrap, and place in freezer. When ready to enjoy, defrost in fridge the night before and microwave for approx 30 seconds, or just place frozen wrap in microwave for 1-2 minutes. Enjoy!


Ingredients:
10 whole wheat tortillas
12 large eggs
1/4 c. milk
1/2 c. shredded cheddar cheese
1/4 c. bacon bits
hot sauce opt.

Scramble eggs, milk, cheese and bacon bits in a large frying pan. Once cooked, add hot sauce and set aside to cool. Place in tortilla and roll up to make burrito. It makes approximately 8-10 burritos depending on how big you make them. Wrap in saran wrap and freeze! When ready to use, take desired amount out and place in refrigerator the night before. In the morning,
 These were so easy to make, just throw the dry ingredients into a bag and store in your pantry for when you want to bring oatmeal into work. It also works really good for camping! I just used what I found in my kitchen and it is so much cheaper than buying the instant oatmeal packets at the store.
Ingredients per pouch:
When you are ready to eat, just add hot water!

Ingredients:
1 can/bottle of your favorite beer
2-3 cups of green chili
1 tbsp fajita seasoning
4 chicken breasts (I used frozen chicken)
1-2 cups shredded cheddar cheese
Place chicken, beer, 1/2 cup green chili, and fajita seasoning in crock pot. Cook on low for 6-7 hours or until chicken shreds easily (I know the picture shows it cooking on high, I was pressed for time, it took only about 4-5 hours and the chicken was just as tender). Removed chicken from crock pot, shred, and place in separate bowl or back into crock pot after the extra liquid is drained. Add the rest of the green chili, to your taste and stir. Place the chicken and green chili on a tortilla, cover with cheese to your liking. Roll up and wrap in saran wrap. Freeze until you are ready to eat and then just pop it in the microwave. I recommend smothering it in more green chili before you microwave, and for more flavor add sour cream (or nonfat plain greek yogurt ).


I found this muffin recipe on pinterest and absolutely love it! Here is the link: http://travisjessjones.blogspot.com/2012/03/banana-oatmeal-muffins.html
I make these ahead of time, freeze them, and then defrost them in the refrigerator the night before I work. In the morning just grab and go, or you could warm it up in the microwave if you like.
 Ingredients:
 Another super easy recipe. Just use the whole wheat sandwich thins, spread peanut butter and jelly on them and freeze. These are great for lunch on the go or a snack!

Buffalo chicken wraps:


3 lb bag of frozen chicken
1 bottle Frank's Red Hot Sauce
1 package whole wheat tortillas
Ranch dressing
Place all ingredients in the crock pot and cook on low for 6 or 7 hours until the chicken shreds easily. Removed chicken from crock pot, shred and place on a whole wheat tortilla and place ranch on top. Roll into wrap, wrap in saran wrap, and place in freezer. When ready to enjoy, defrost in fridge the night before and microwave for approx 30 seconds, or just place frozen wrap in microwave for 1-2 minutes. Enjoy!

Breakfast Burritos:
These only took me about 30mins to make, and I made two batches. These will be good to freeze and then microwave to eat on my way to work.
Ingredients:
10 whole wheat tortillas
12 large eggs
1/4 c. milk
1/2 c. shredded cheddar cheese
1/4 c. bacon bits
hot sauce opt.

Scramble eggs, milk, cheese and bacon bits in a large frying pan. Once cooked, add hot sauce and set aside to cool. Place in tortilla and roll up to make burrito. It makes approximately 8-10 burritos depending on how big you make them. Wrap in saran wrap and freeze! When ready to use, take desired amount out and place in refrigerator the night before. In the morning,
just microwave for 30-60 secs and enjoy!
 |
| Tip: for all my wraps I like to line them up with the last fold down on the edge of a cookie sheet, this keeps them rolled up :) |
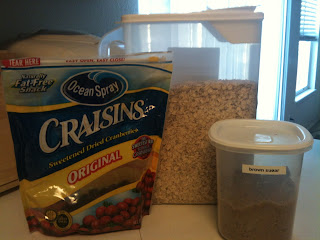
Instant oatmeal:
 These were so easy to make, just throw the dry ingredients into a bag and store in your pantry for when you want to bring oatmeal into work. It also works really good for camping! I just used what I found in my kitchen and it is so much cheaper than buying the instant oatmeal packets at the store.
Ingredients per pouch:
1/2 c. quick oats
1 tbsp brown sugar
1 tbsp craisins
When you are ready to eat, just add hot water!
Chicken enchiladas:
This is a combination of a recipe given to me from a friend and just adding whatever sounded good. Perfect for microwaving on days when we have nothing to eat for dinner.
Ingredients:
1 can/bottle of your favorite beer
2-3 cups of green chili
1 tbsp fajita seasoning
4 chicken breasts (I used frozen chicken)
1-2 cups shredded cheddar cheese
Place chicken, beer, 1/2 cup green chili, and fajita seasoning in crock pot. Cook on low for 6-7 hours or until chicken shreds easily (I know the picture shows it cooking on high, I was pressed for time, it took only about 4-5 hours and the chicken was just as tender). Removed chicken from crock pot, shred, and place in separate bowl or back into crock pot after the extra liquid is drained. Add the rest of the green chili, to your taste and stir. Place the chicken and green chili on a tortilla, cover with cheese to your liking. Roll up and wrap in saran wrap. Freeze until you are ready to eat and then just pop it in the microwave. I recommend smothering it in more green chili before you microwave, and for more flavor add sour cream (or nonfat plain greek yogurt ).


Muffins:
I found this muffin recipe on pinterest and absolutely love it! Here is the link: http://travisjessjones.blogspot.com/2012/03/banana-oatmeal-muffins.html
I make these ahead of time, freeze them, and then defrost them in the refrigerator the night before I work. In the morning just grab and go, or you could warm it up in the microwave if you like.
 Ingredients:
2 1/2 cup oats (old fashioned kind, not quick cooking)
1 cup plain low fat greek yogurt
2 eggs
3/4 cup sweetener of choice or 2 tbs stevia
1 1/2 tsp baking powder
1/2 tsp baking soda
2 bananas
Preheat oven to 400 degrees. Spray muffin tin with non-stick cooking spray or line muffin tins with silicone or foil liners (paper liners don't work with a base that doesn't include flour). Blend all of the ingredients in a blender or food processor, and blend until oats are smooth (I have a pretty old blender so I found it easiest to add all of the liquid ingredients and then slowly add the dry ones). Divide batter among cupcake liners and bake for 20-25 minutes or until toothpick comes out clean.
 |
| The front ones are the second batch I made (I forgot baking soda in the first batch [top left], oops! They still taste the same they are just not as fluffy and more of a banana bread consistency) |
Homemade uncrustables:
 Another super easy recipe. Just use the whole wheat sandwich thins, spread peanut butter and jelly on them and freeze. These are great for lunch on the go or a snack!
Subscribe to:
Comments (Atom)